Incoming Webhooks are a simple way to post messages from apps into Slack. Creating an Incoming Webhook gives you a unique URL to which you send a JSON payload with the message text and some options. You can use all the usual formatting and layout blocks with Incoming Webhooks to make the messages stand out.
Create an Incoming Webhook
1. Create a Slack app (if you don't have one already)
You won't get very far without doing this step, but luckily it's very simple, we even have a nice green button for you to click:
Pick a name, choose a workspace to associate your app with (bearing in mind that you'll probably be posting lots of test messages, so you might want to create a channel for sandbox use), and then click Create App. If you've already created one, you can use it too, also have a cookie 🍪.
2. Enable Incoming Webhooks
After creating, you'll be redirected to the settings page for your new app (if you are using an existing app, just load its settings via your app's management dashboard).
From here select the Incoming Webhooks feature, and click the Activate Incoming Webhooks toggle to switch it on. If you already have this activated, well you deserve another cookie 🍪.
3. Create an Incoming Webhook
Now that Incoming Webhooks are enabled, the settings page should refresh and some extra options will appear. One of those options will be a really helpful button marked Add New Webhook to Workspace, and you should click it.
What this button does is trigger a shortcut version of the installation flow for Slack apps, one that is completely self-contained so that you don't have to actually build any code to generate an Incoming Webhook URL. We'll show how you can generate webhooks programmatically later, but for now you'll see something like the following screen:

Go ahead and pick a channel that the app will post to, and then click to Authorize your app.
You'll be sent back to your app settings, and you should now see a new entry under the Webhook URLs for Your Workspace section, with a Webhook URL that'll look something like this:
https://hooks.slack.com/services/T00000000/B00000000/XXXXXXXXXXXXXXXXXXXXXXXX
That URL is your shiny new Incoming Webhook, one that's specific to a single user, and a single channel. We've kind of run out of cookies, but nice work anyway!
Let's see how you can actually use that webhook to post a message.
Keep it secret, keep it safe. Your webhook URL contains a secret. Don't share it online, including via public version control repositories. Slack actively searches out and revokes leaked secrets.
4. Use your Incoming Webhook URL to post a message
Later in this doc we'll explain how to make your messages more expressive or interactive, but for right now something simple will do, so we're going to use that old standby - "Hello, world".
After all this build up, you might think posting a message will be really complicated, but it's very simple. Just make an HTTP POST request like this:
POST https://hooks.slack.com/services/T00000000/B00000000/XXXXXXXXXXXXXXXXXXXXXXXX
Content-type: application/json
{
    "text": "Hello, world."
}
The URL that you're making the POST request to should be the same URL you generated in the previous step.
That's it! Go and check the channel that your app was installed into, and you will see that the "Hello, World" message has been posted by your app.
You can use this in a real Slack app without much change, just substituting your favorite HTTP Request library for cURL, but structuring all the requests in the exact same way. You will also need to pay attention to some details we've outlined below when you're distributing your app.
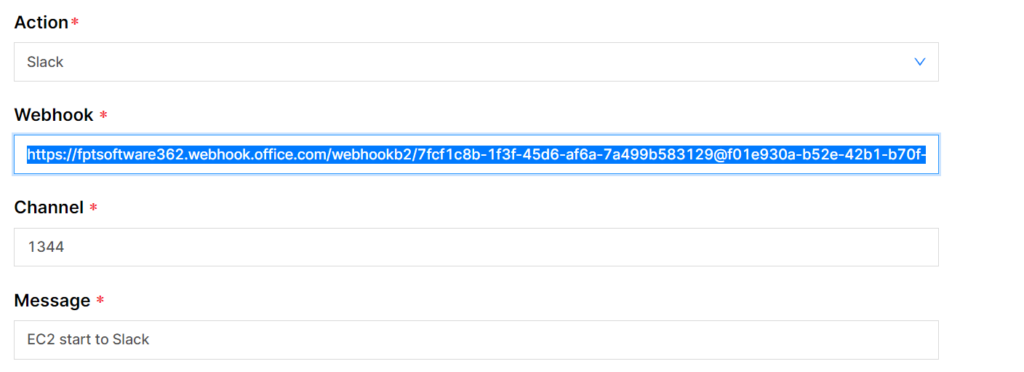
Fill in the Rule setting
Copy and paste to the Webhook parameter in Rule setting