This guideline helps you how to Setup SSO screen on Cloud Identity app.
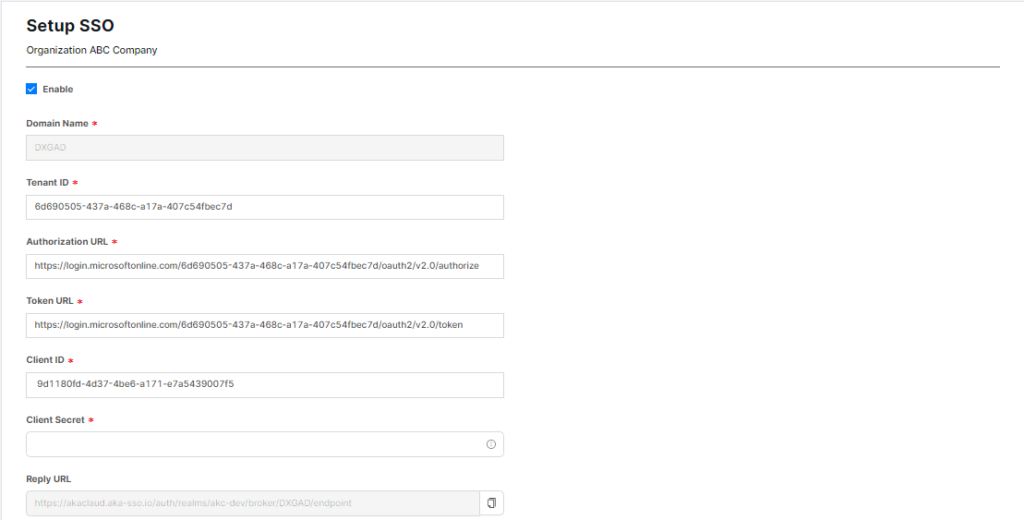
To configure SSO, you perform steps as below:
Step 1: Go to Azure Active Directory. Choose App registrations. Choose apps that you will implement connect to app dxCloudSuite to take information.

Step 2: Take information
- Application Application (Client) ID on Azure AD correspond with Client ID on Setup SSO screen of Cloud Identity
- Directory (tenant) ID on Azure AD correspond with Tenant ID on Setup SSO screen of Cloud Identity
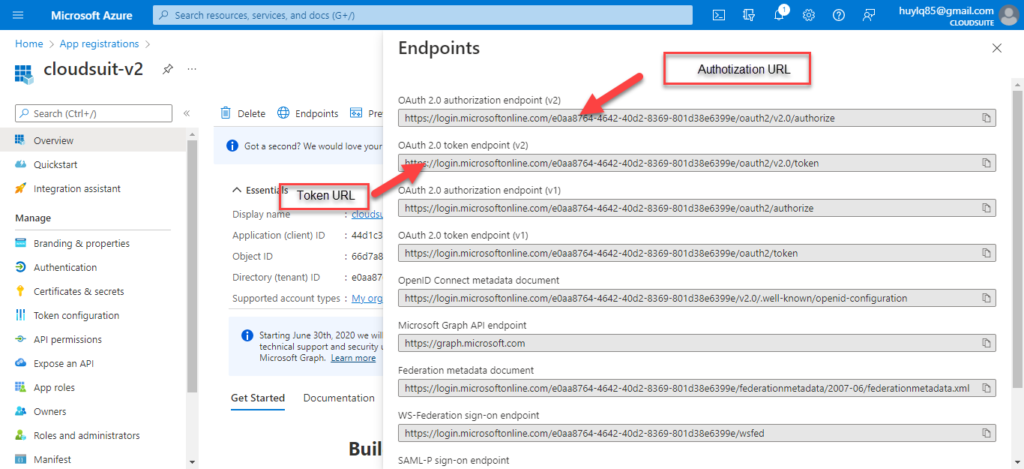
Step 3: Choose Endpoints to take Token URL & Authorization URL as below image:
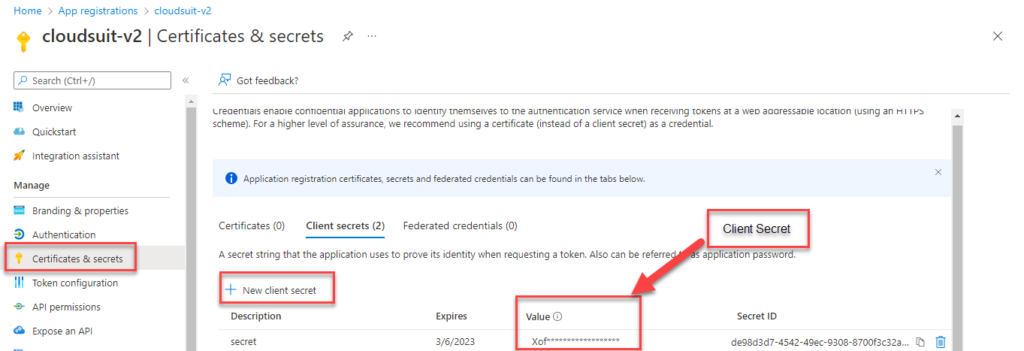
Step 4: On Azure AD. Go to Certificates & Secrets. Choose Client secrets to fill information in Client Secret field on Setup SSO screen.
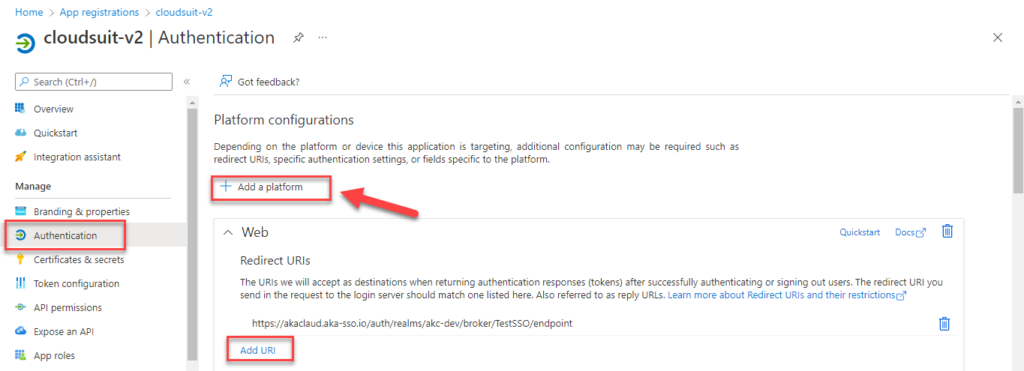
Step 5: You take information in Reply URL field on Setup SSO screen. Go to Azure AD. Choose Authentication. Click on Add a platform > Configurations platform web. Choose Add URI. User performs to fill URI correspond with Reply URL on Setup SSO screen.
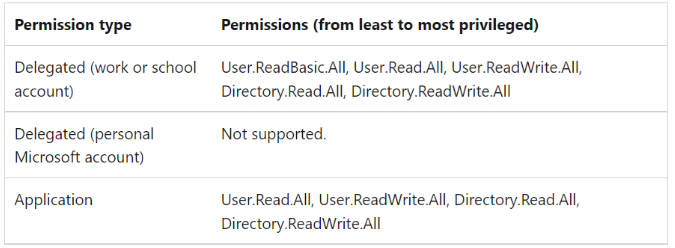
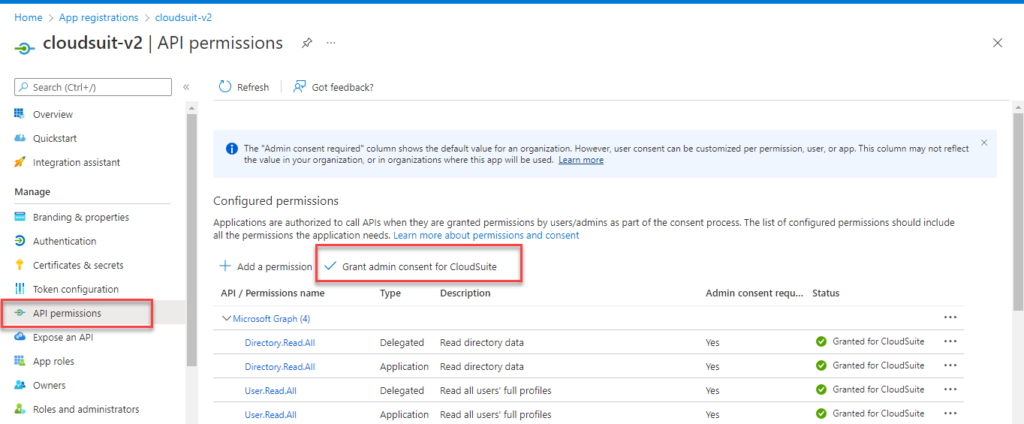
Note: To take List Users to invite User on system, you grant API permissions: