Cloud account is sometimes called as cloud credential. You need to initiate cloud credentials to access some information from your cloud resources. For example, Amazon Web Services (AWS), requires access keys and secret keys, Azure requires app registration, GCP requires service account.
To create Azure cloud credential, we need to setup and collect the following information:
Azure Cloud Credential: App registration with corresponding roles.
- Cloud Expense: Cost & Billing policy
- Cloud Safe: Security Auditing policy
- Cloud Automation: Resource policy
1. Login to Azure & add App registrations
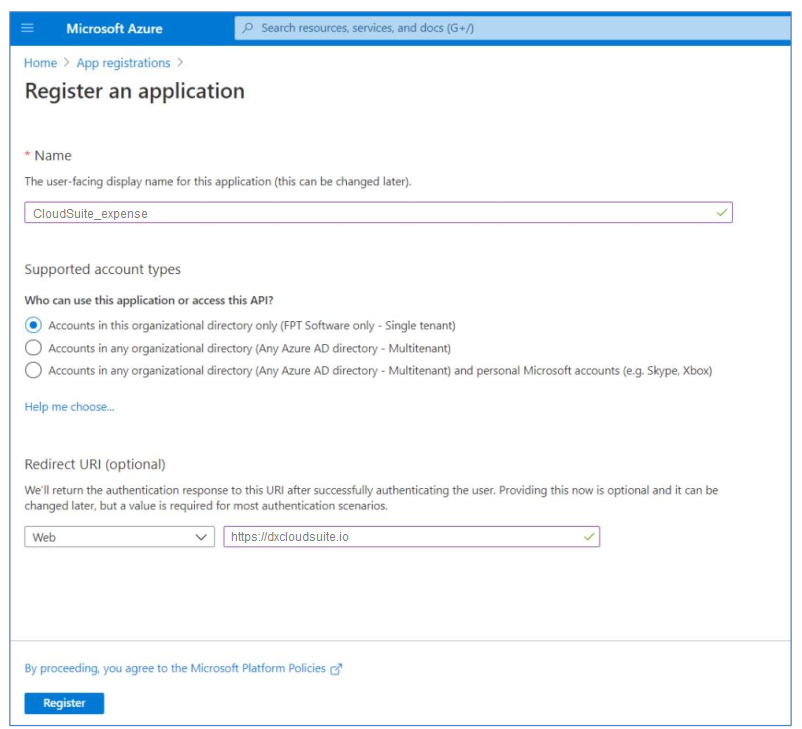
Log in to Microsoft Azure and select Azure Active Directory > App registrations > New application registration.

b) Enter a Name to identify the application(ex: CloudExpense-credential), select Supported account types and choose Accounts in this organizational directory only, enter https://dxcloudsuite.io/ as the Redirect URI, and then click Register.
c) Generate a client secret for the CloudSuite application.
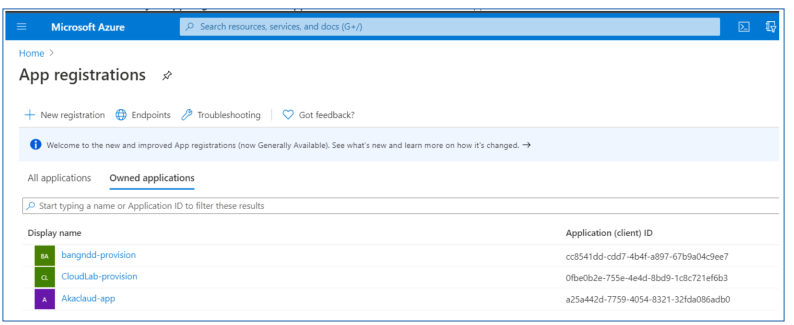
- Select Azure Active Directory > App Registrations > All Applications and select the application.
- Add a client secret or the application password (Certificates & Secrets > New client secret).

- Enter a Description (Ex: CloudSuite_Expense secret token) and select a Duration (Ex: In 2 years).
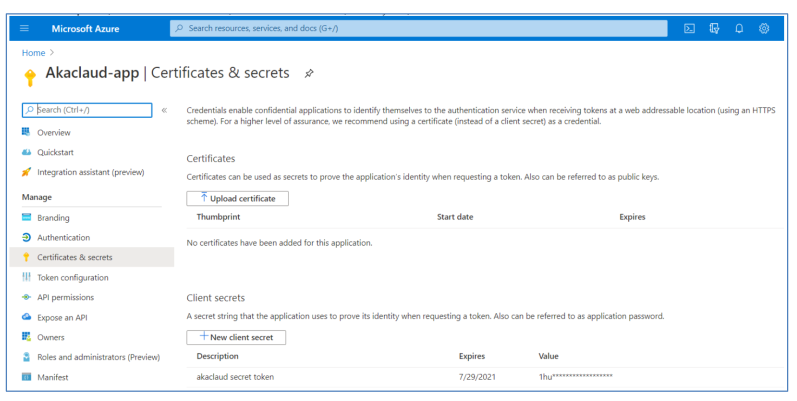
- Copy the value of that new client secret for your records because you cannot view this key after you close this dialog. You will need this new client secret application key when you Add an Azure Subscription on CloudSuite.
2. Grant permissions for the application
We provide you the policies of Cloud Credential according to the least privileges to minimize the security risks.
| Cloud Apps | Corresponding role |
|---|---|
| Cloud Safe | Reader |
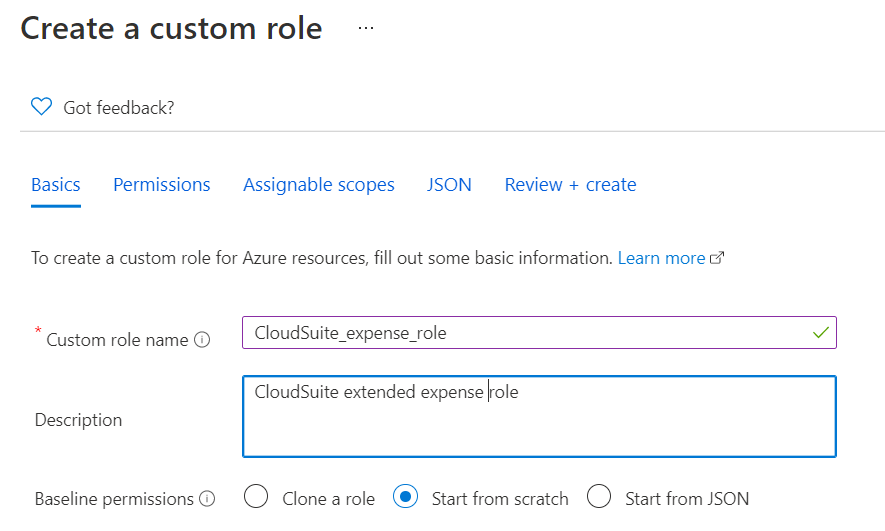
| Cloud Expense | Reader Custom Role (extended role) "Microsoft.Storage/storageAccounts/listkeys/action", "Microsoft.CostManagement/query/action", "Microsoft.CostManagement/forecast/action" |
| Cloud Automation | Contributor or depending on the template that you use |
Note: To assign roles, you must have Owner or User Access Administrator privileges on your Azure Subscription.
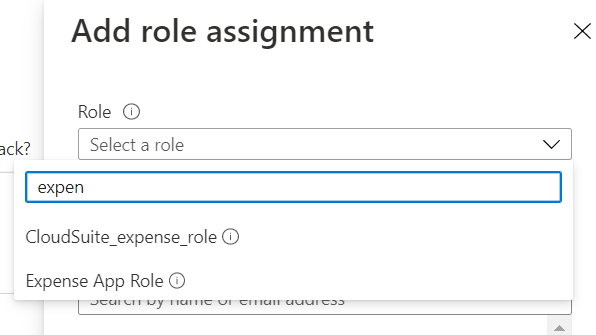
Attach the Azure pre-defined policies which is associated with your application such as Reader of Cloud Safe, Reader of Cloud Expense, Contributor of Cloud Automation
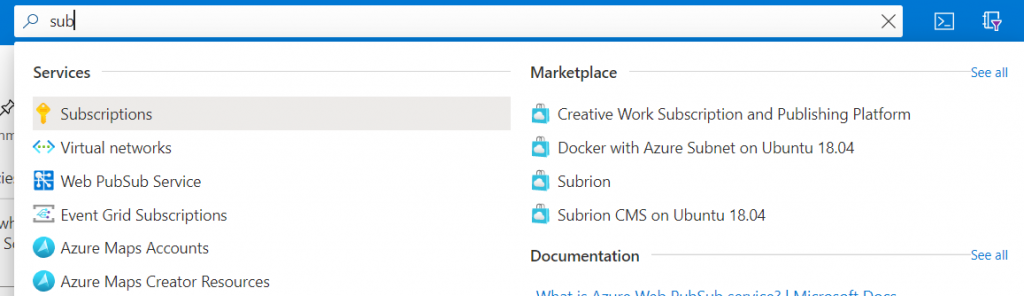
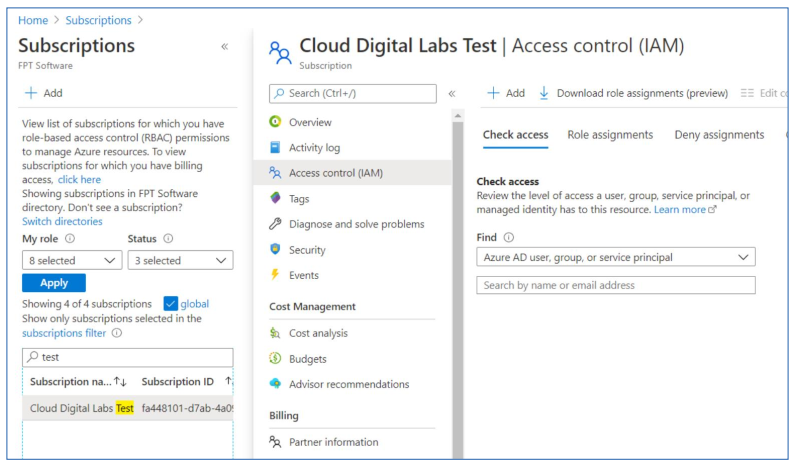
a) Select All Services > Subscriptions.
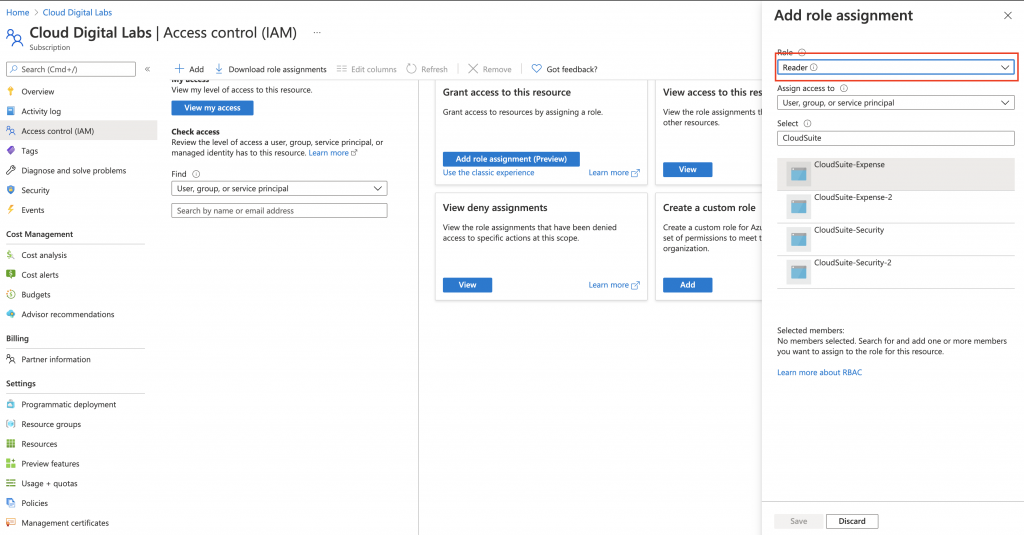
b) Select your subscription and Add role assignment Access Control (IAM)
c) Select the Role, verify that Azure AD user, group, or service principal is selected (Assign access to), and select the app to assign the corresponding roles.
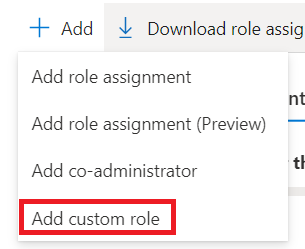
Attach added custom role which is associated with your application by downloading the policy and paste to the inline policy

"Microsoft.Storage/storageAccounts/listkeys/action", "Microsoft.CostManagement/query/action", "Microsoft.CostManagement/forecast/action"
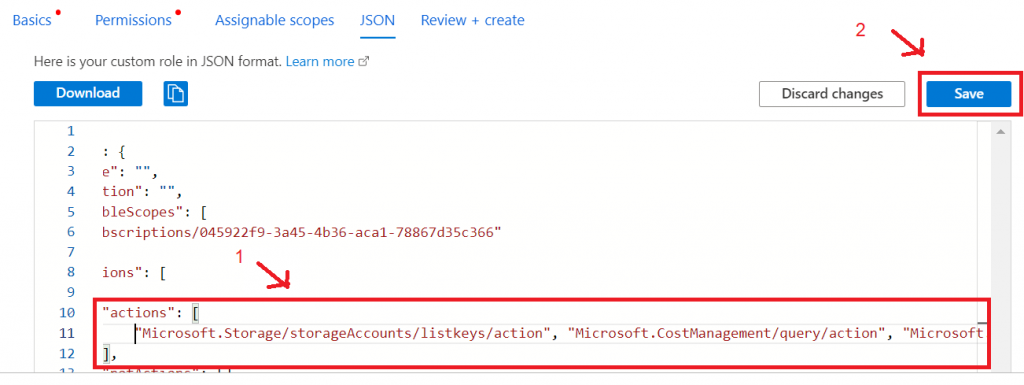
Attach added custom role to the CloudSuite application
3. Get the information on the CloudSuite application
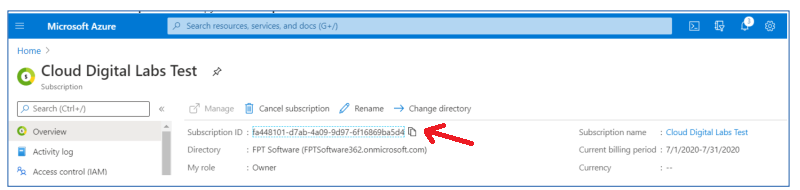
a) Select All Services > Subcriptions and copy the Subscription ID
b) Select Azure Active Directory > App Registrations > All Applications, find the CloudSuite Application you've created, and copy the Directory ID, Application ID.

c) Copy Secret ID which generated when you create application earlier
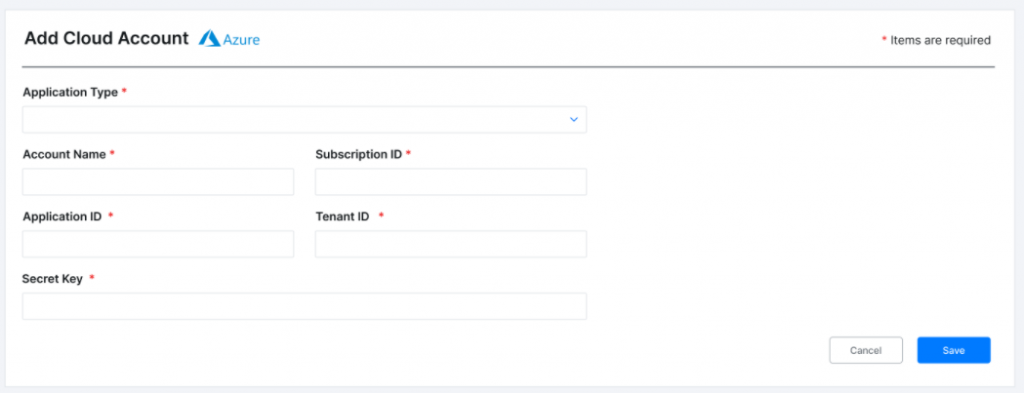
4. Filling out the Cloud Account with parameters
Go to the Cloud Identity and register Cloud Credential:
- Subscription ID: **********
- Application ID: **********
- Tenant ID: **********
- Secret Key: **********