Cloud account is sometimes called as cloud credential. You need to initiate cloud credentials to access some information from your cloud resources. For example, Amazon Web Services (AWS), requires access keys and secret keys, Azure requires app registration, GCP requires service account.
To create GCP cloud credential, we need to setup and collect the following information:
GCP Cloud Credential parameter
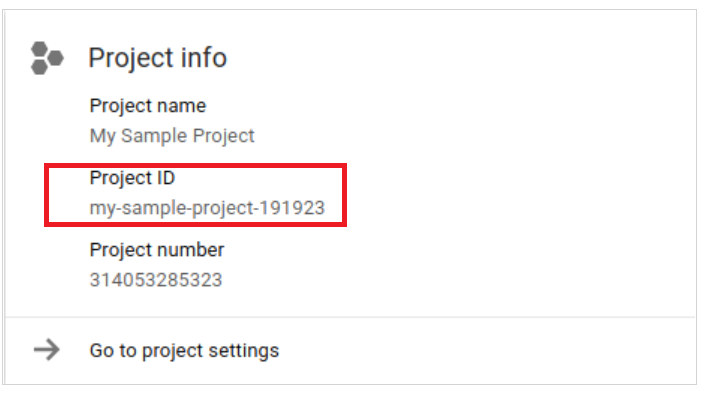
- Project ID
- Service Account ID
- Private key
- Billing report's parameter (for Expense app)
GCP Cloud Credential role
- Cloud Expense: Cost & Billing policy
- Cloud Safe: Security Auditing policy
- Cloud Automation: Resource policy
Report name & table name: for Cloud Expense.
It is recommended to create the Cloud credential under the least privileges Service Account to avoid any security issue.
Learn how to establish the identity of your Google Service Account in order to use it with CloudSuite applications.
1. GCP project
CloudSuite need an active GCP project to host its resources. So please create a GCP project following the creation process provided by Google.
The project ID and project number are displayed on the project Dashboard Project info card:
If you don't get familiar with Project, you can take a look at this article: Creating and managing projects
2. Create Service account
We will guide you step by step on how to create a service account in the below section.
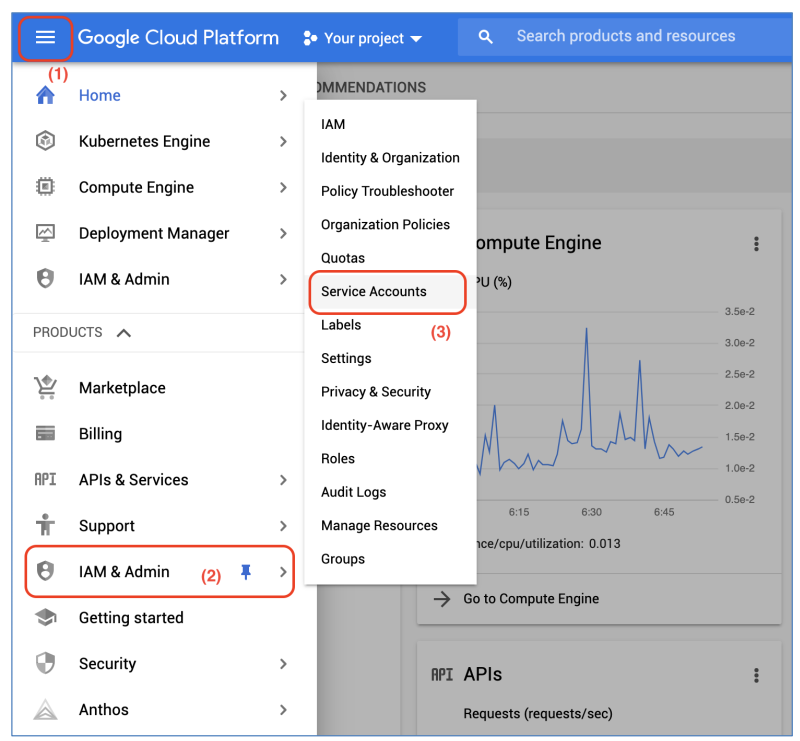
a) Login to GCP web console and go to the Navigation menu > IAM & Admin > Service Accounts to access to Service Accounts management page:
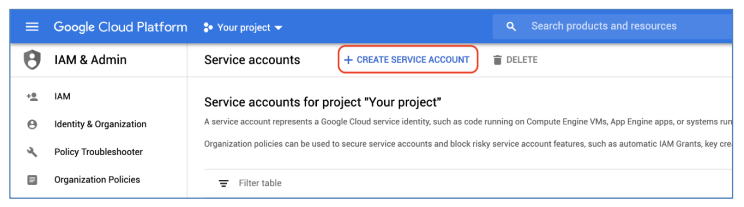
b) In the Service Accounts management page, click on Create Service Account to create a new Service Account:
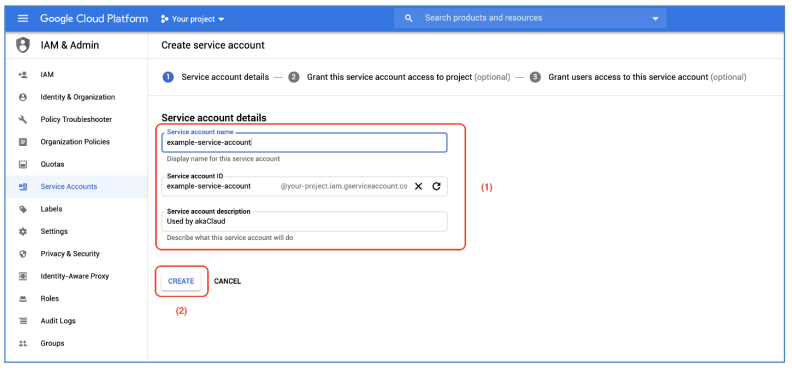
c) Enter the Service Account Name, Service Account ID, and some descriptions for the Service Account, then click on Create button to create the Service Account:
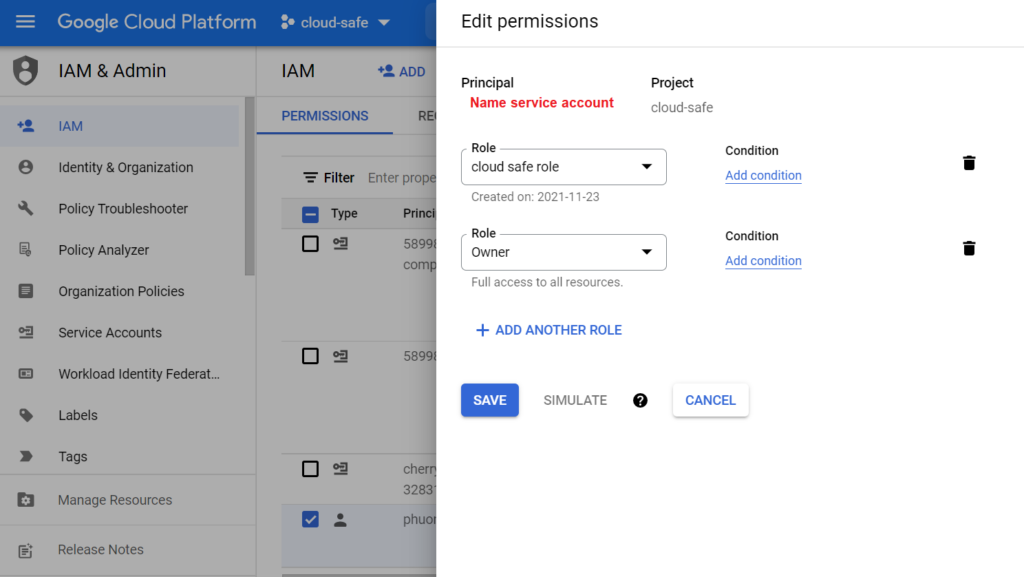
3. Grant roles
In the next step after the Service Account has been created, you need to grant some roles to this Service Account to perform future operations on CloudSuite applications later on. The permission is as below:
| Cloud Apps | Corresponding role |
|---|---|
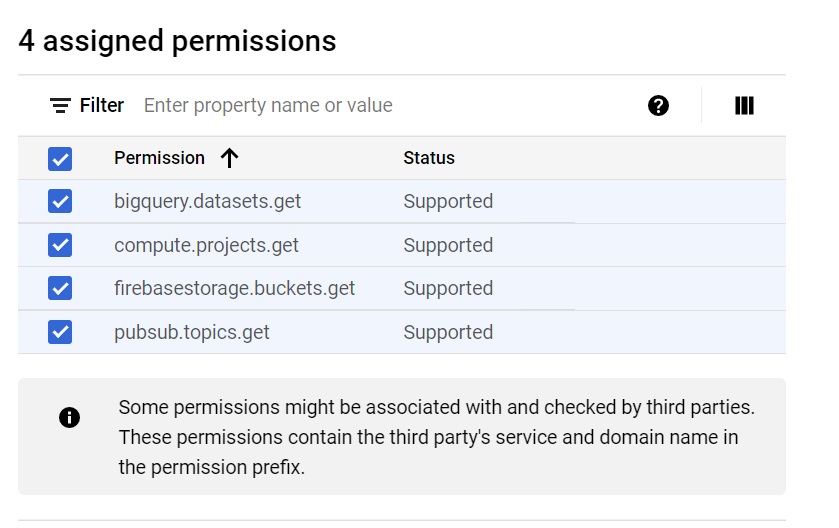
| Cloud Safe | Project/Security Reviewer Project/Custom Role - BigQuery Data Viewer: bigquery.datasets.get - Compute Viewer : compute.projects.get - Firebase viewer : firebasestorage.buckets.get - Pub/Sub Viewer : pubsub.topics.get |
| Cloud Expense | Project/BigQuery Data Viewer Project/BigQuery Job User Project/Viewer (Tag policy) |
| Cloud Automation | Project/Viewer or Project/Editor if using Service Catalog |
You can filter the roles and do fine-grained control for that Service Account as you want. If you don't know which roles need to be chosen, we recommend that you pick up Project Editor role and IAM Security Admin role to avoid any error about permission and ensure that every labs work fine.
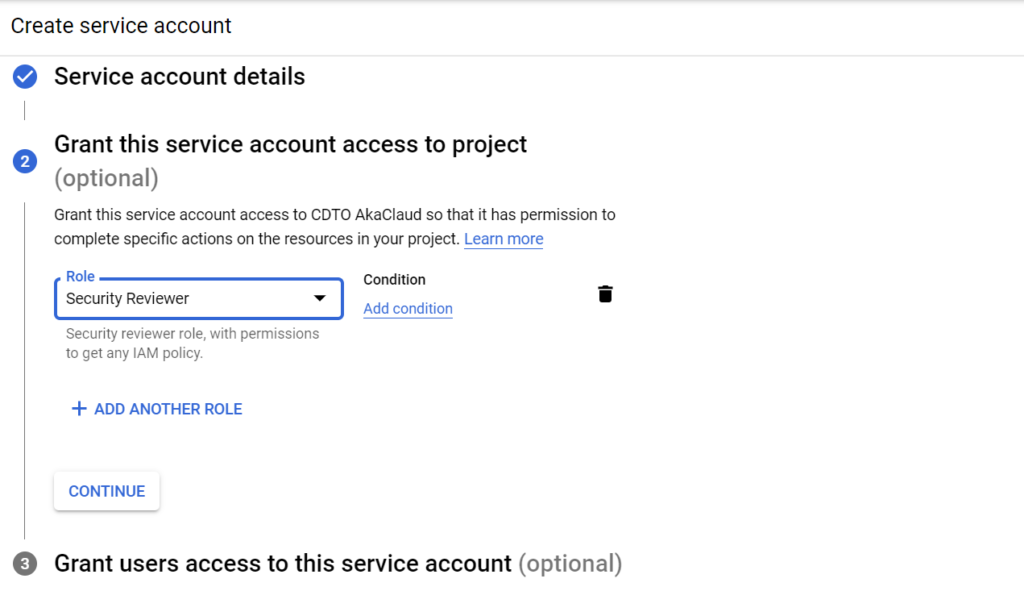
After pick up the roles, click on Continue button to go to the next step:
You don't need to grant users access to this service account, so click on Done to finish the service account creation
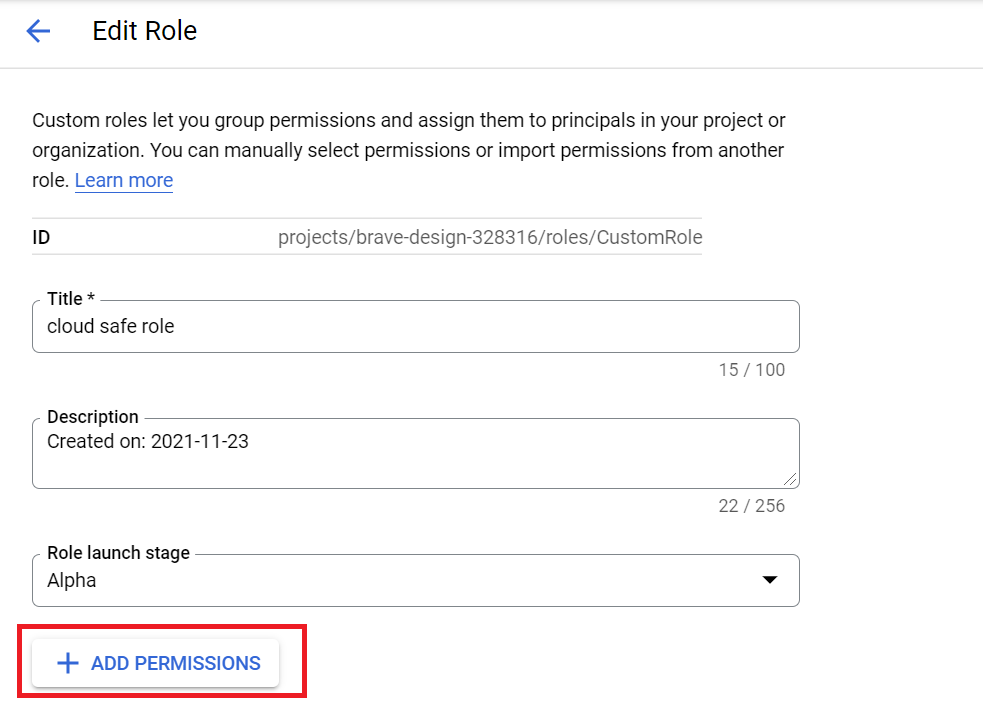
* For Cloud Safe role:
- Create the custom role beside the Security Viewer role
- Add permission for customer role
4. Create a new private key
Create a new access key for the created service account
Access key is the secret parameter used to authenticate the service account with Google Cloud APIs. After created the service account, no access key is created by default. So you need to create a new key.
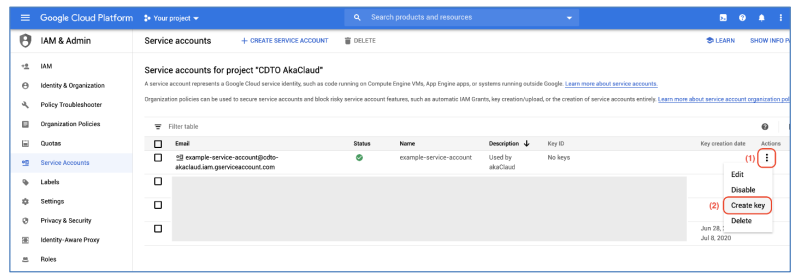
a) In the Service Account management page, find the service account that you created in the previous steps, then click on More... > Create key
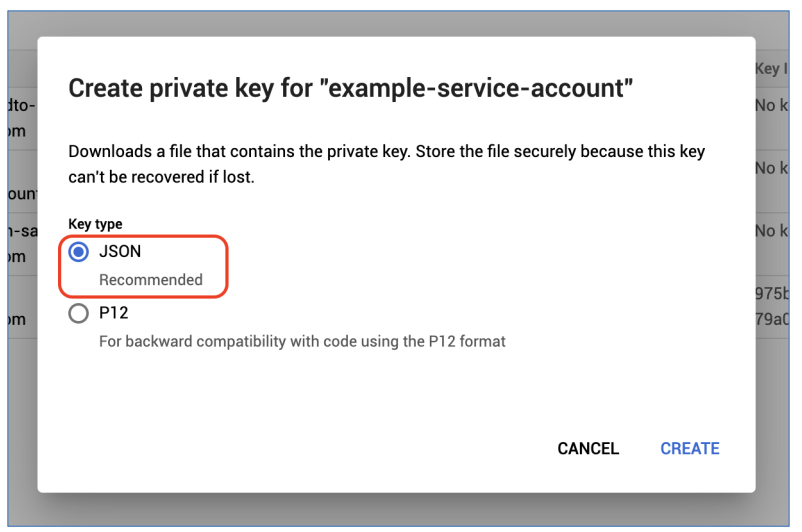
b) The popup for select private key type will appear, tick on JSON type, and then click on Create
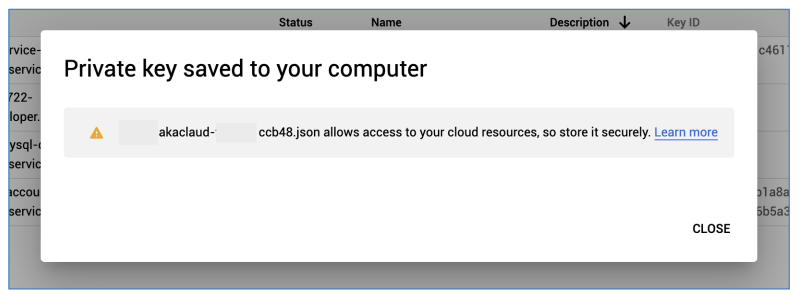
c) The private key file will automatically downloaded to your computer. This file contains sensitive data of your service account, so store it securely.
After downloaded private key file, click on Close to close the popup:
5. Report name & table name
Note that report name & table name are two parameters used for Cloud Expense only.
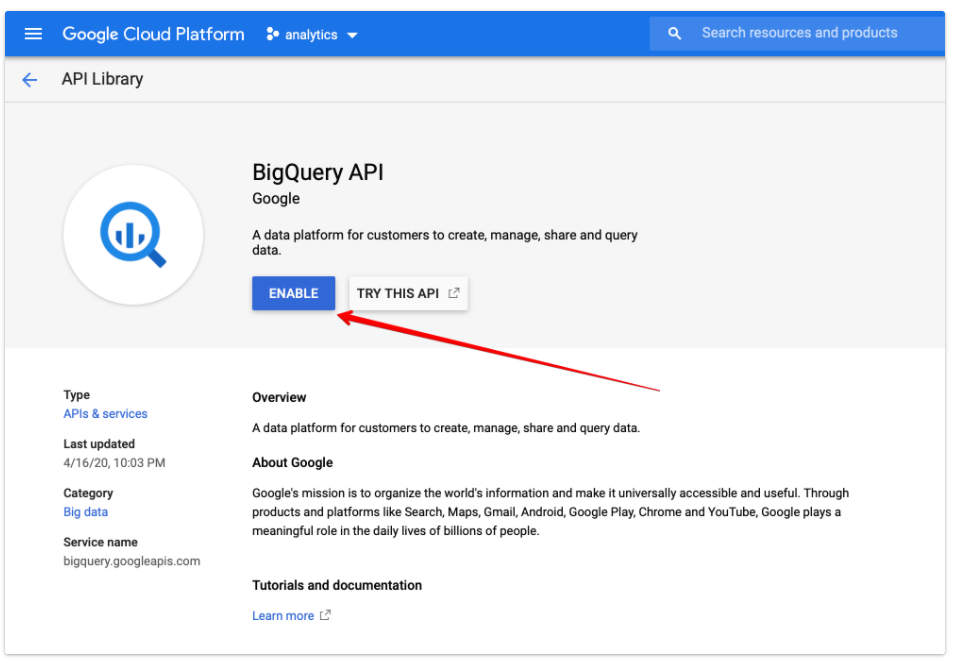
Step 1: The first step you need to do Enable BigQuery API
Step 2: Setup to create report
- Enable Cloud Billing Data Export to BigQuery (click here)
- Get the report name and table name