Once you completely provision the AKS, you can connect to AKS Azure as below:

Then, we go to the folder containing the azure-kubectl, for example, cd ~.azure-kubectl
Windows
For Windows users, you can open the PowerShell, then install it locally using the command:
# az aks install-cli

Then, we login to the azure by command line azure login

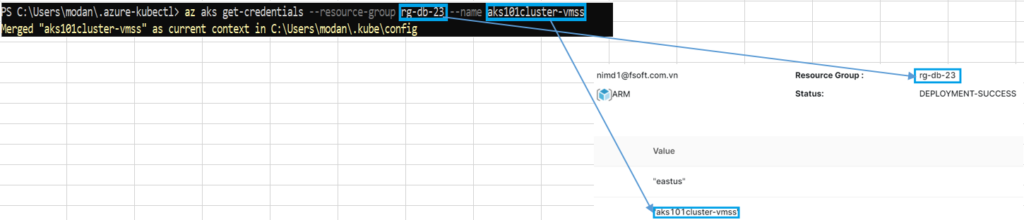
Then, we connect to the cluster using Kubectl with the following example and gets credentials for the AKS cluster named myAKSCluster in myResourceGroup.az aks get-credentials --resource-group myResourceGroup --name myAKSCluster
Then, we can verify the connection to our cluster by running kubectl get nodes

Linux
Firstly, we can install az-cli for Linux by command line:
curl -sL https://aka.ms/InstallAzureCLIDeb | sudo bash
Then, we can install aks by command line:
az aks install-cli
On Linux OS, we should use sudo before the command lin

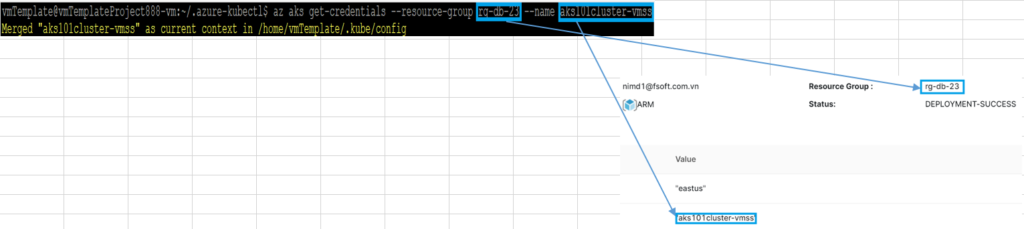
Then, we connect to the cluster using Kubectl with the following example and gets credentials for the AKS cluster named myAKSCluster in myResourceGroup.az aks get-credentials --resource-group myResourceGroup --name myAKSCluster
Then, we can verify the connection to our cluster by running the below command:kubectl get node
