Creating and connecting to a MySQL DB Instance
![](https://cdn.dxcloudsuite.io/wp-content/uploads/2023/05/30102715/image-17.png)
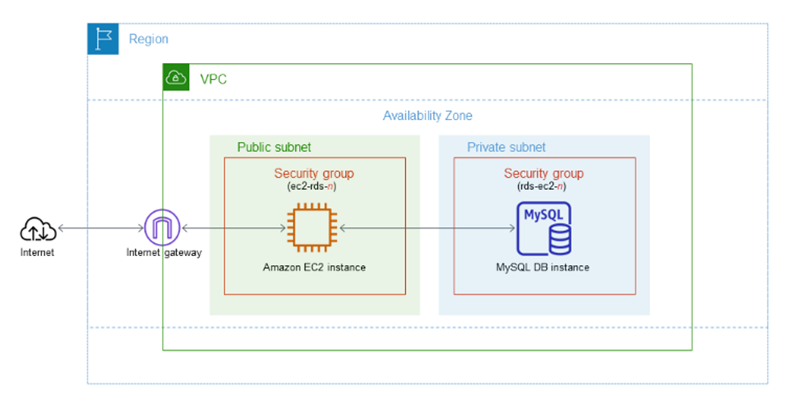
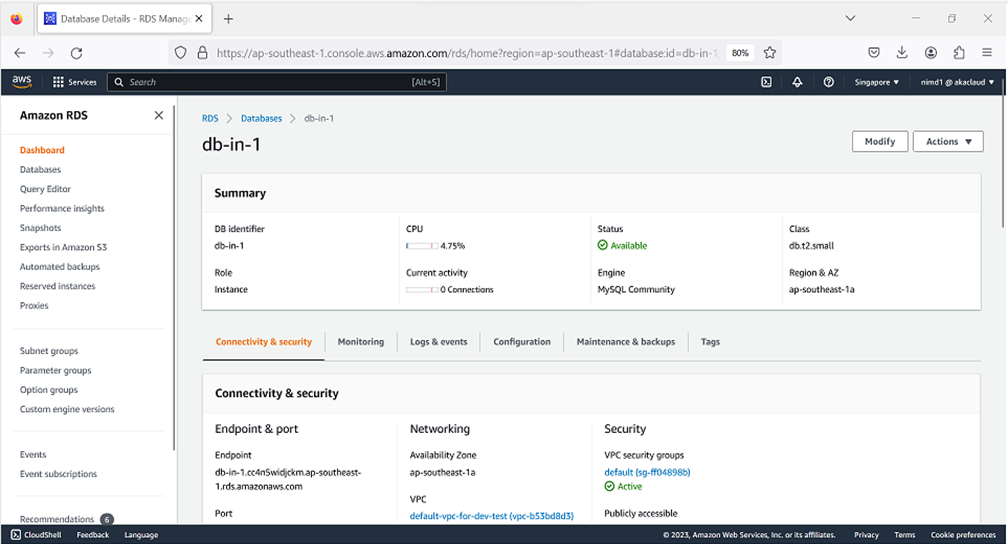
Once you completely provision the database, you can connect to the database AWS as below
![](https://cdn.dxcloudsuite.io/wp-content/uploads/2023/05/30102842/image-18.png)
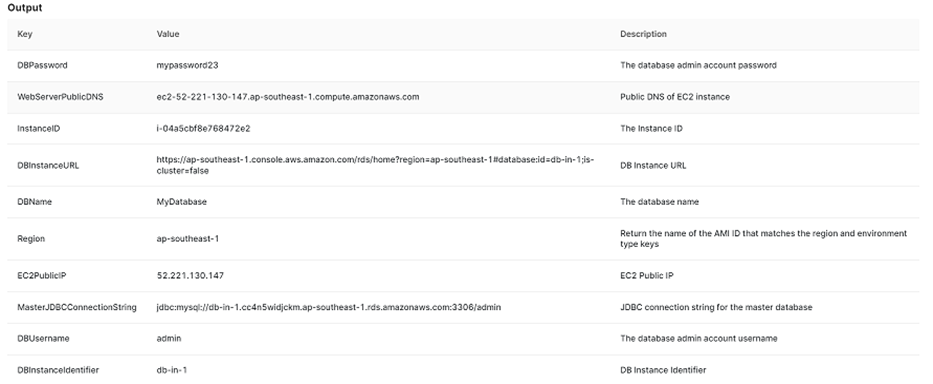
Then, we can go to the database Instance URL by getting the link below
![](https://cdn.dxcloudsuite.io/wp-content/uploads/2023/05/30103057/image-19-1024x190.png)
Then, we can login to the AWS
![](https://cdn.dxcloudsuite.io/wp-content/uploads/2023/05/30103251/image-20.png)
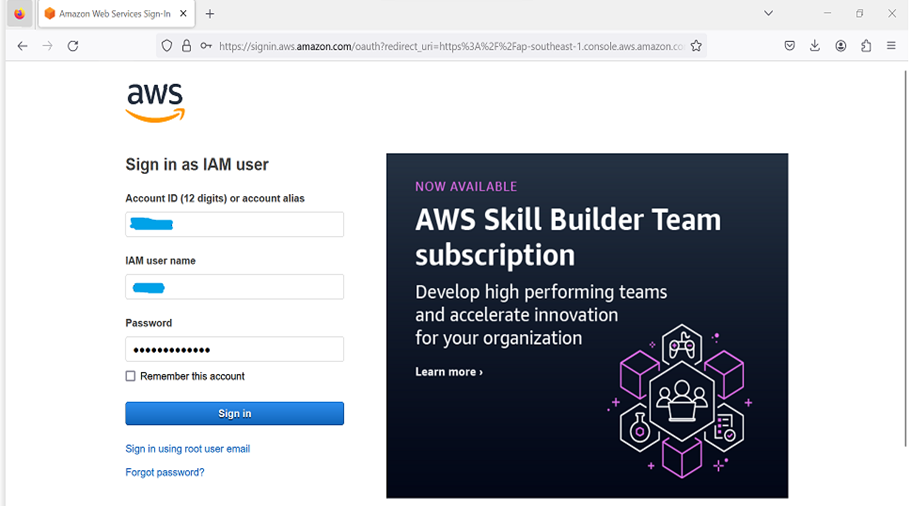
And then, we can connect to the database instance URL
![](https://cdn.dxcloudsuite.io/wp-content/uploads/2023/05/30103402/image-21.png)
Then, we choose 'Set up EC2 conection' with the instanceId EC2 that we can get from the template output
![](https://cdn.dxcloudsuite.io/wp-content/uploads/2023/05/30103452/image-22.png)
![](https://cdn.dxcloudsuite.io/wp-content/uploads/2023/05/30103804/image-23-1024x172.png)
![](https://cdn.dxcloudsuite.io/wp-content/uploads/2023/05/30103856/image-24.png)
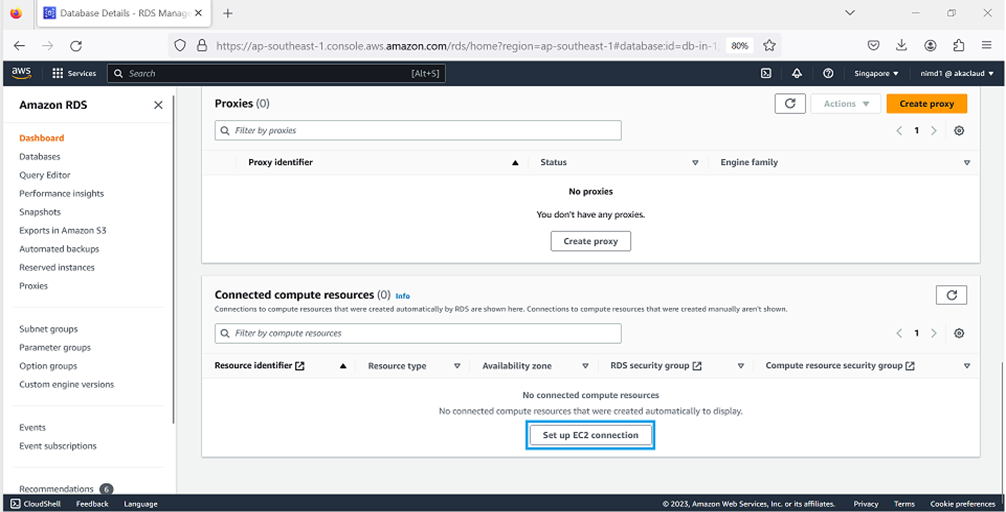
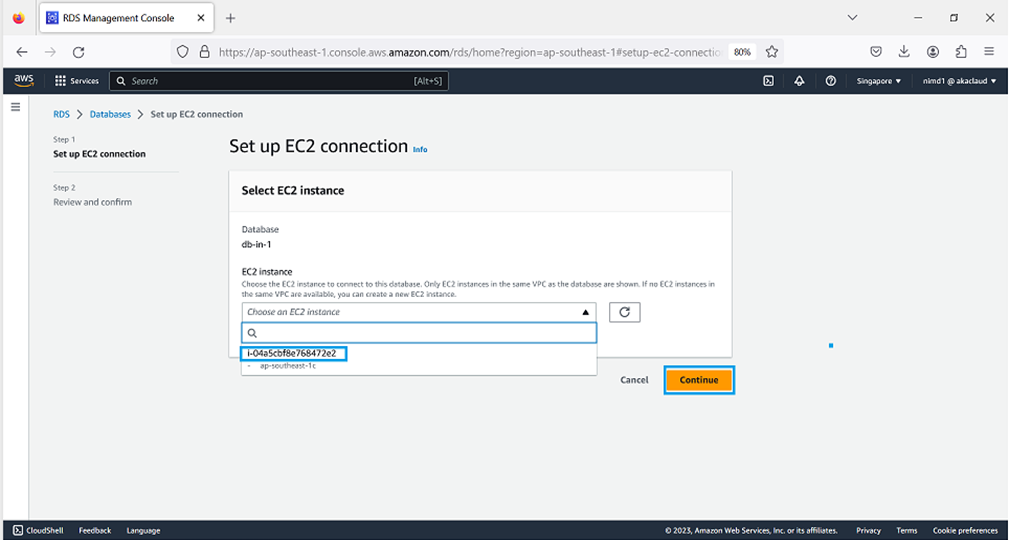
And then, we click button Confirm.
![](https://cdn.dxcloudsuite.io/wp-content/uploads/2023/05/30103954/image-25.png)
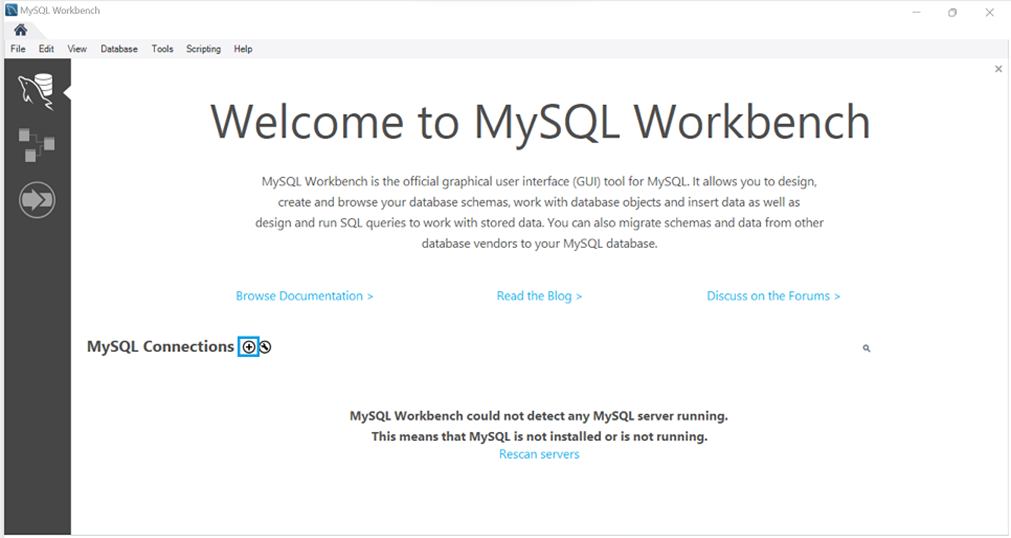
And now, we can connect to the database
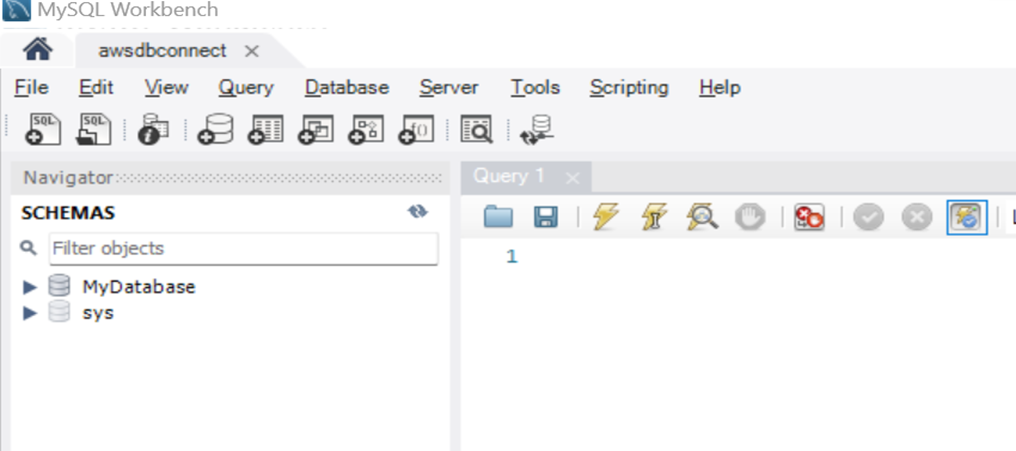
Then, we open the MySQL workbench, and then click button '+'
![](https://cdn.dxcloudsuite.io/wp-content/uploads/2023/05/30104139/image-26.png)
Then, we choose 'Standard TCP/IP over SSH'
![](https://cdn.dxcloudsuite.io/wp-content/uploads/2023/05/30104328/image-27.png)
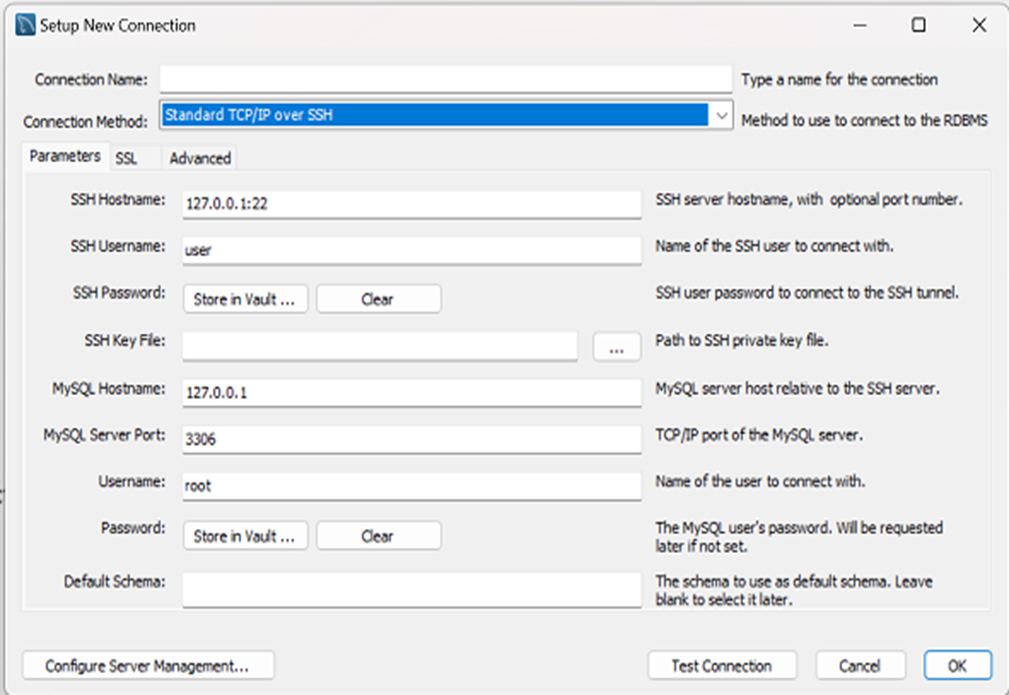
Then, we will be configured below
![](https://cdn.dxcloudsuite.io/wp-content/uploads/2023/05/30131035/image-43-1024x236.png)
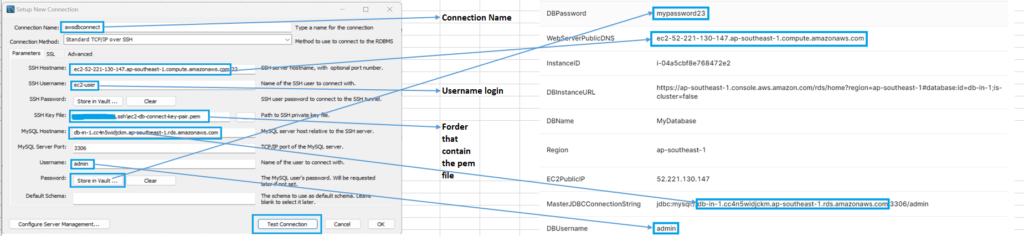
Then, we click the button 'Test Connection'
![](https://cdn.dxcloudsuite.io/wp-content/uploads/2023/05/30105022/image-29.png)
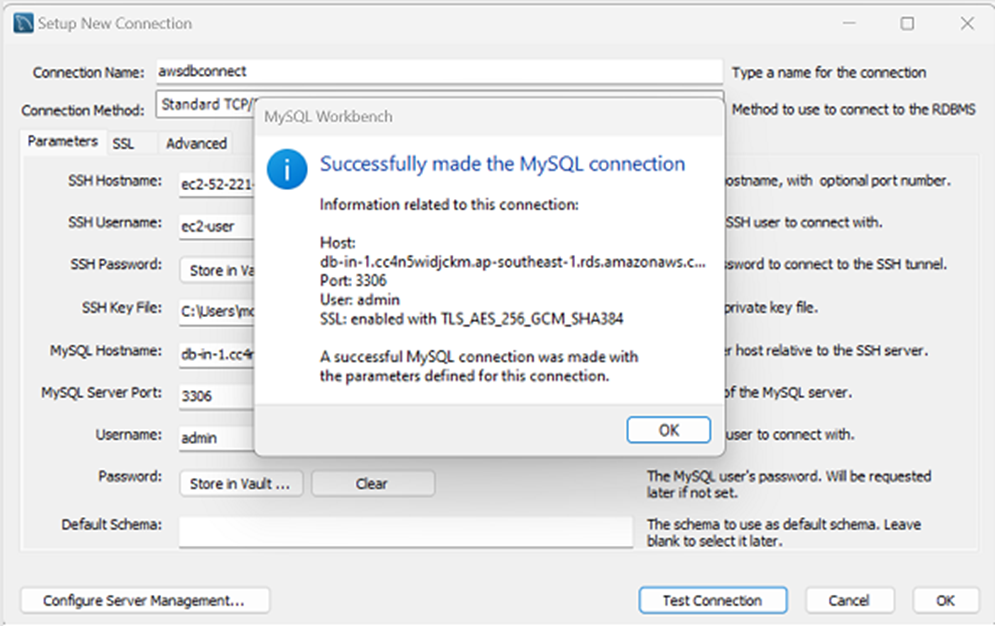
Then, we click the button 'OK'
![](https://cdn.dxcloudsuite.io/wp-content/uploads/2023/05/30105238/image-30.png)
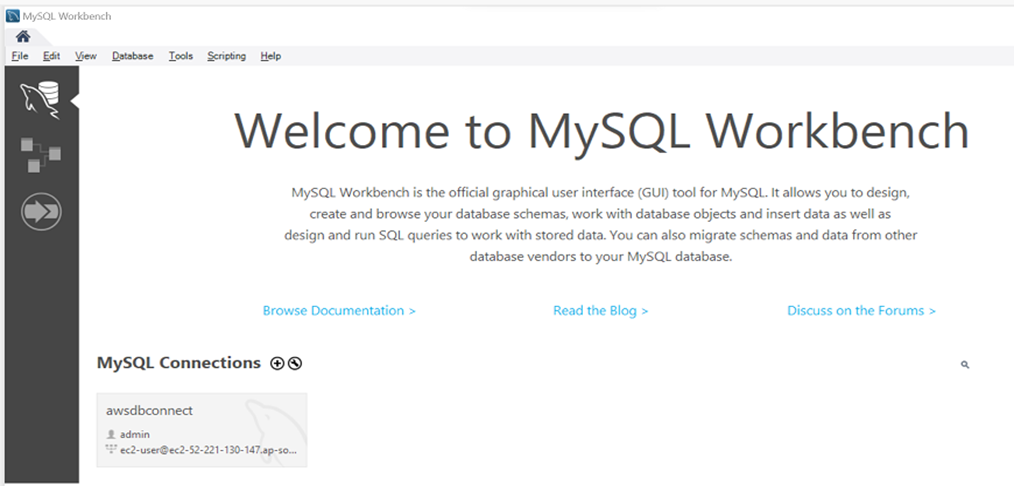
Finally, we can double-click on the configuration that can connect the database.
![](https://cdn.dxcloudsuite.io/wp-content/uploads/2023/05/30105423/image-31.png)