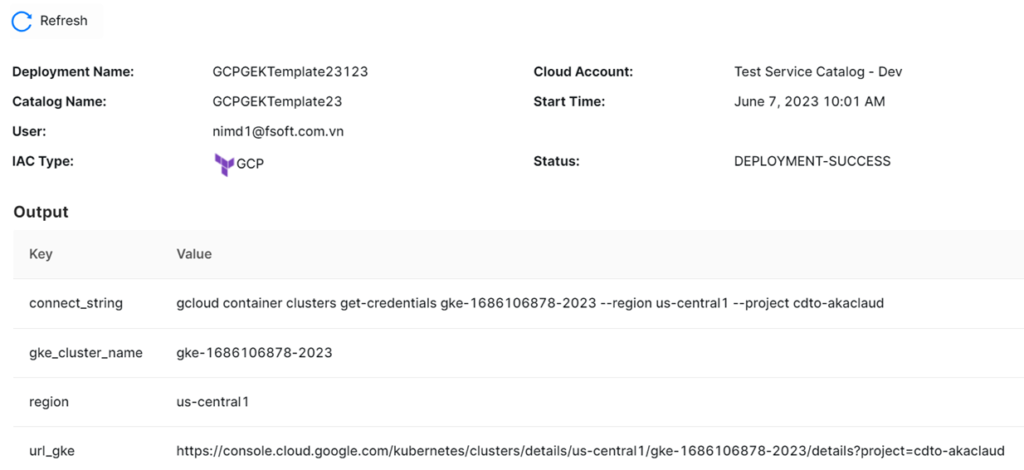
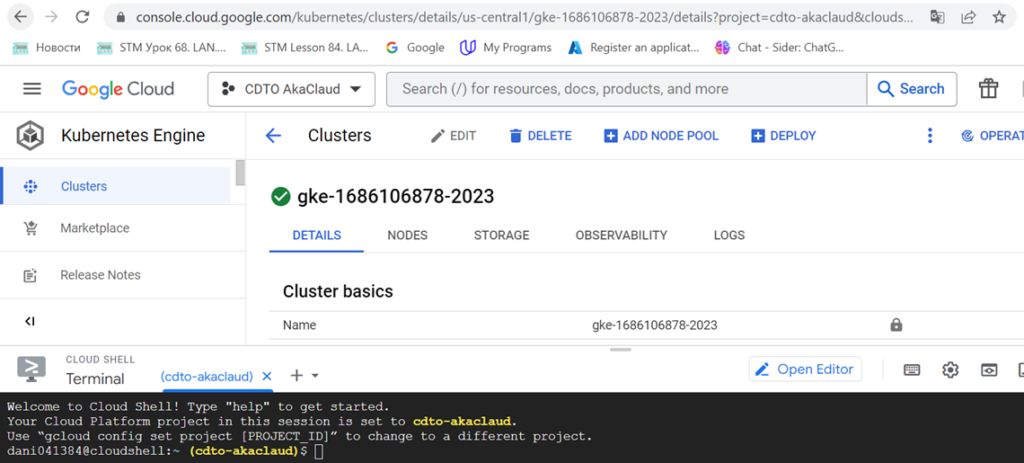
Once you completely provision the Kubernetes Engine success, you can view the output as below:
Then, we can connect to the Kubernetes Engine by accessing URL that we can get from the output:

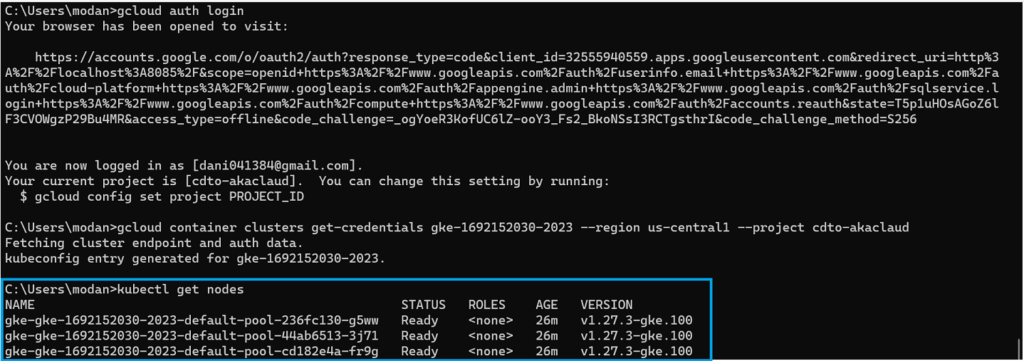
Finally, we are able to connect to the Kubernetes Engine as below:
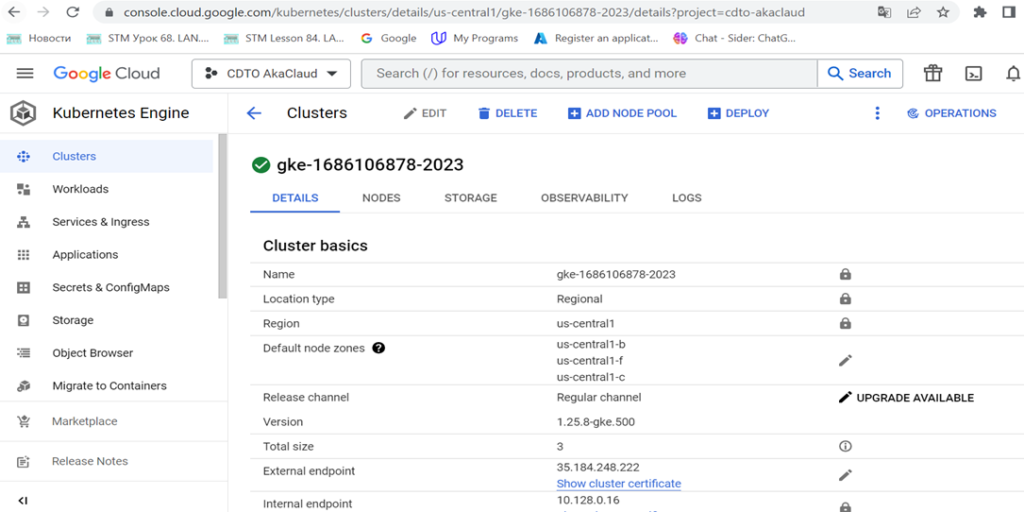
Note, we should log in to the project on the GCP before opening the URL Kubernetes Engine
Then, we open cli on GCP to connect the Kubernetes
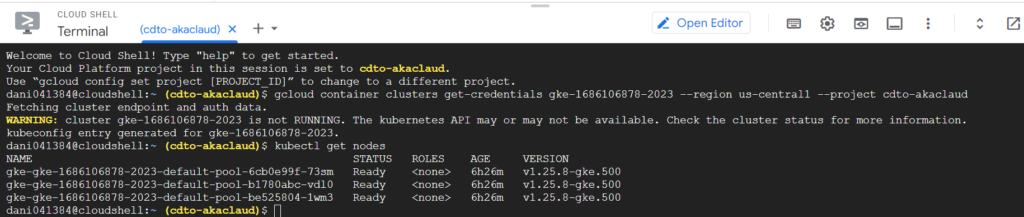
Then, we can use the script connect_string that the template output before


Then, we can get node of the Kubernets kubectl get nodes
Windows
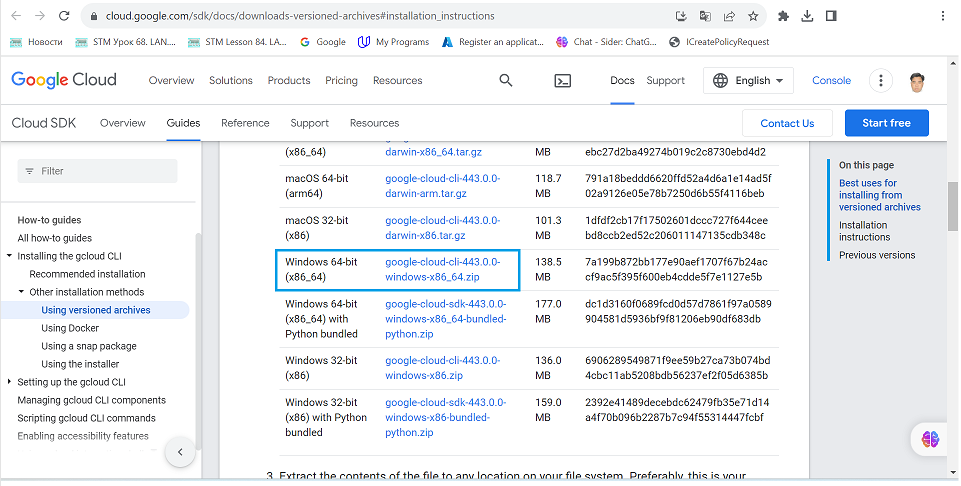
Firstly, we can download Google Cloud CLI Package at https://cloud.google.com/sdk/docs/downloads-versioned-archives#installation_instructions
Open up PowerShell's command line.
cd ~\Downloads
mv google-cloud-cli-443.0.0-windows-x86_64.zip ~\
cd ~\
Expand-Archive google-cloud-cli-443.0.0-windows-x86_64.zip .
rm google-cloud-cli-443.0.0-windows-x86_64.zip
cd google-cloud-sdk
.\install.bat
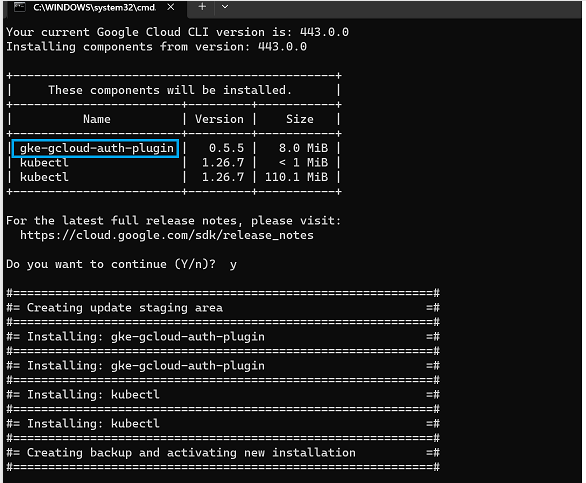
Update gcloud and install kubectl for gcp
gcloud components update
gcloud components install kubectl
After install kubectl we have
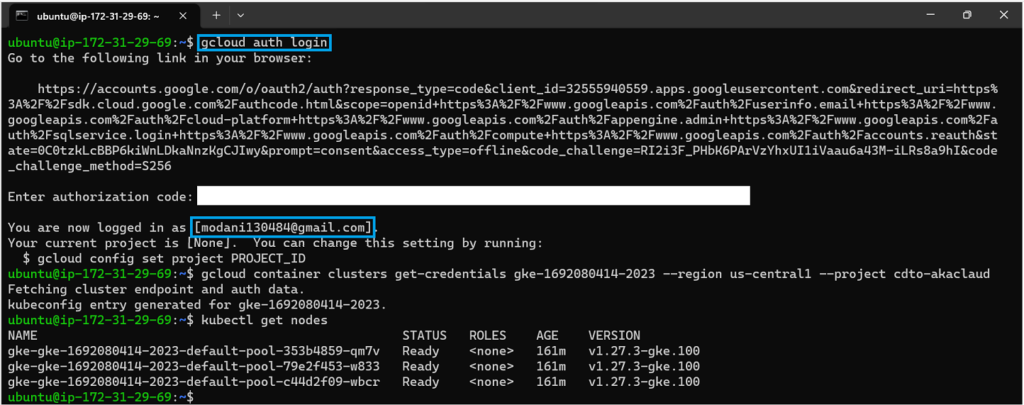
Then, we can login to gcp by using the command line gcloud auth login

Then, we can use the script connect_string that the template output before
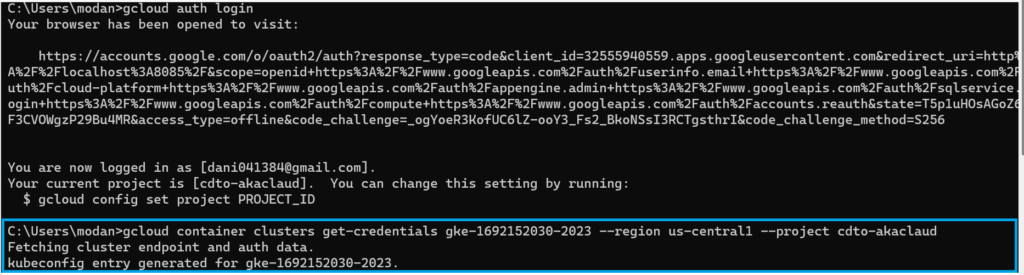
Then, we can get node of the Kubernets kubectl get nodes
Linux
On the Linux system, we can install the kubernets-cli by using the command line
Firstly, we install gcloud for the system by command line as below
curl https://packages.cloud.google.com/apt/doc/apt-key.gpg | sudo apt-key --keyring /usr/share/keyrings/cloud.google.gpg add -
sudo apt update
sudo apt-get install google-cloud-sdk
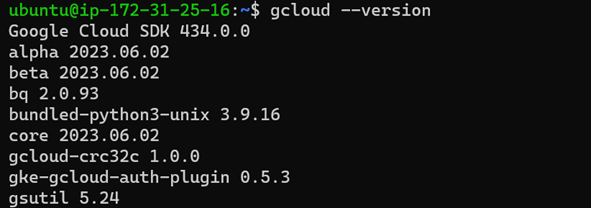
After installing gcloud, we can check version by command line: gcloud --version
Then, we can install the Kebernets by command line sudo apt-get install -y kubectl
After installing the Kubernetes, we can check version by command line: kubectl version --short --client

Then, we can install Kubectl authentication by command line sudo apt-get install google-cloud-sdk-gke-gcloud-auth-plugin

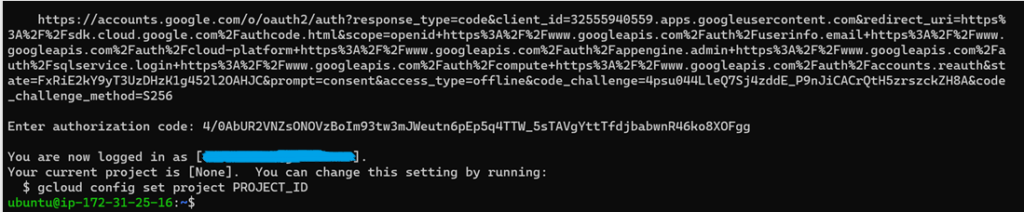
Then, we can connect gke by login with command line gcloud auth login

Then, we can use the link for login the google cloud
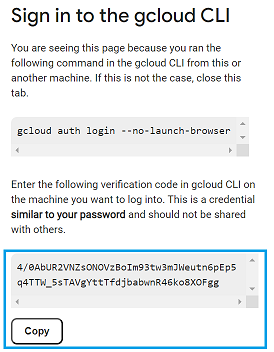
Then, we copy the authorization code and then push it to the console
Then, we can use the script connect_string that the template output before

Finally, we can get node of the Kubernets kubectl get nodes

Note: grant access
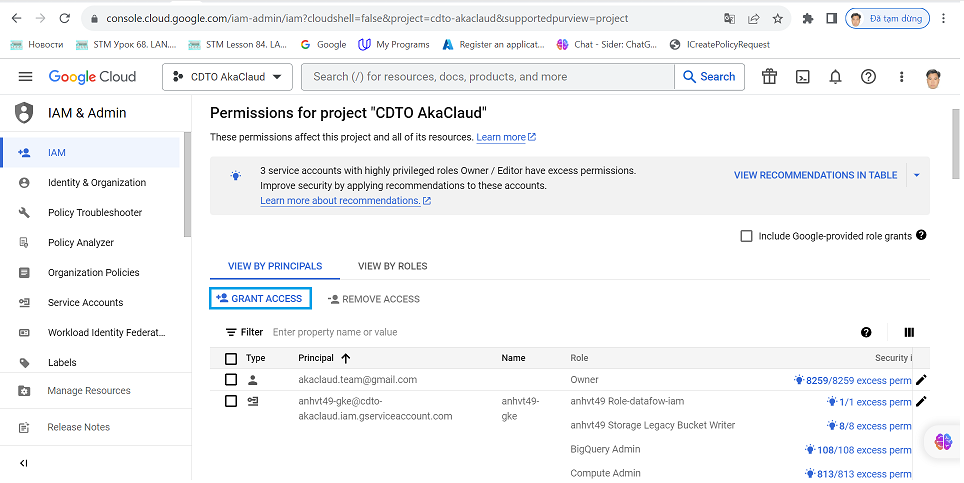
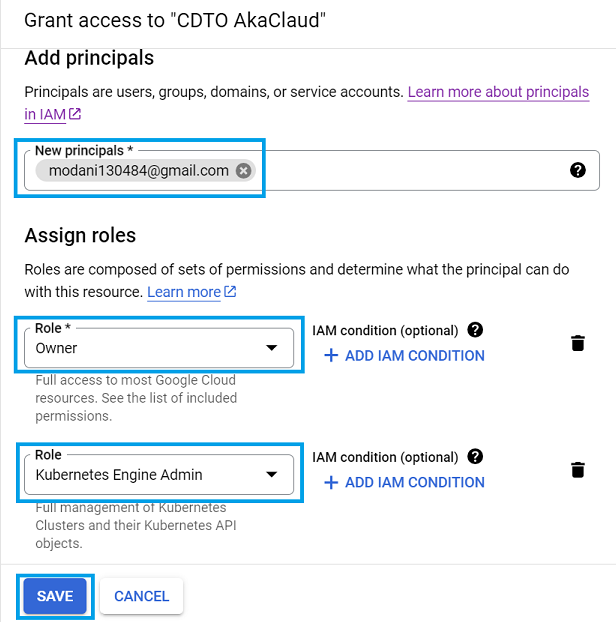
Then, we have
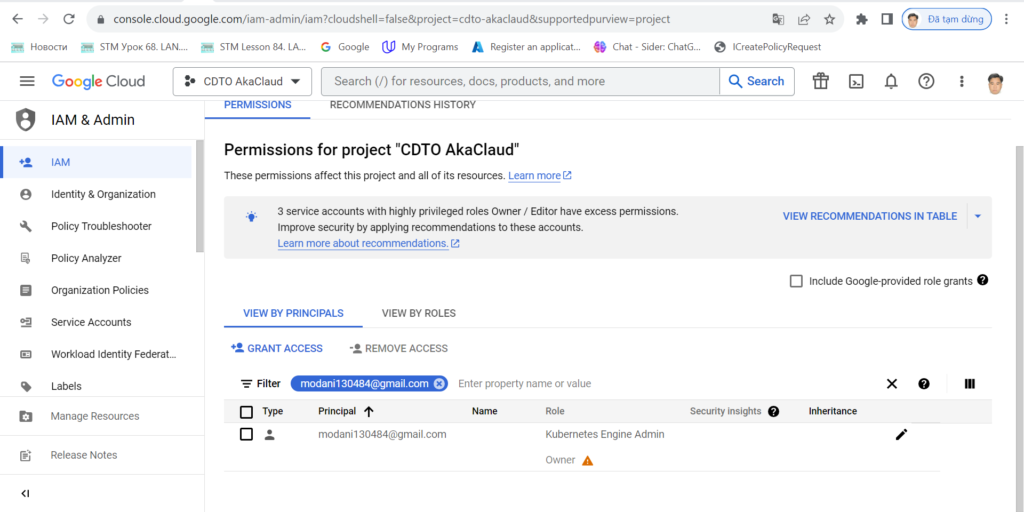
So, we can connect to google kubernets engine